The Complete Guide to DIY Paint Correction and Scratch Removal
Transform your car's paint from dull and scratched to showroom-shine with this complete guide. Learn the tools, techniques, and secrets of professional paint correction.
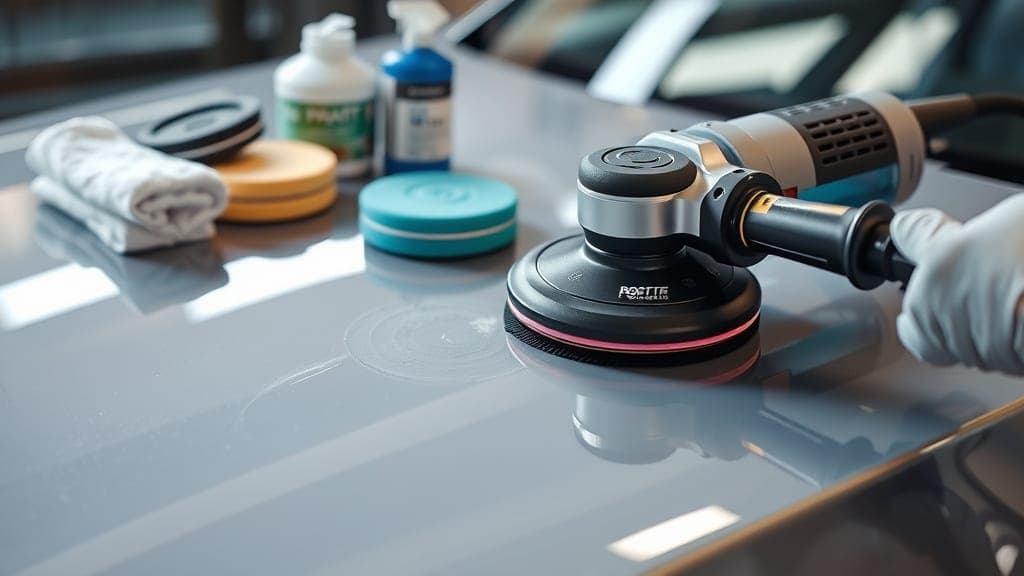
A dual-action polisher on a car hood, surrounded by professional detailing tools
The Complete Guide to DIY Paint Correction and Scratch Removal
You spend an afternoon washing and waxing your car. You step back to admire your work, and then you see it—a web of fine swirl marks catching the light, a scratch you don't remember getting. You feel a knot in your stomach. The car looks worse than when you started.
This is one of the most frustrating experiences for any car owner. You try to take care of your vehicle, and somehow, you end up making it look worse. The good news? You can fix it. With the right tools and techniques, you can restore your car's paint to a showroom-quality finish.
The Fragile Shield: Understanding Your Car's Paint
Your car's paint isn't just a color. It's a protective system designed to look good while shielding the metal beneath from rust and corrosion. Modern cars typically have three layers:
- The Primer: The base layer that bonds to the metal
- The Base Coat: The layer that gives the car its color
- The Clear Coat: The transparent top layer that provides gloss and protection
The clear coat is typically only 1.5 to 2.0 millimeters thick. That is thinner than a human hair. It is the most vulnerable layer, and it is the one that suffers from swirl marks, scratches, and oxidation.
The Science of Paint Correction
Paint correction is the process of removing a microscopic layer of the clear coat to level out the surface and eliminate defects. Think of it like sanding a piece of wood to get a smooth surface, but on a much smaller, more delicate scale.
The principle is simple: you use abrasive compounds and polishes to remove the damaged layer of clear coat, revealing a fresh, smooth surface underneath. But the execution requires patience, the right tools, and a careful touch.
The Math Behind It:
A compound contains microscopic abrasives. When you work it into the paint, these abrasives cut into the clear coat, leveling out the surface. A polish then refines that surface, removing the micro-scratches left by the compound and bringing out the deep, wet-looking gloss.
The key is to use the least aggressive method possible. You want to remove just enough clear coat to eliminate the defect—and no more.
What You'll Need: The Tools of the Trade
Investing in the right tools is the first step to success. Here is what you will need for a proper paint correction.
Essential Tools
🔧 Machine Polisher
A dual-action polisher is highly recommended for beginners. It minimizes the risk of burning the paint because it combines a rotational motion with a random orbital motion.
🟣 Polishing Pads
You will need at least three types of pads:
- Cutting Pad: Aggressive, for deep scratches
- Polishing Pad: Medium, for light swirls
- Finishing Pad: Soft, for final gloss
🧴 Compounds & Polishes
These are the abrasives that do the work.
- Compound: For heavy cutting and scratch removal
- Polish: For refining the finish
🧽 Microfiber Towels
High-quality, clean microfiber towels are essential for wiping off residue without marring the finish.
Recommended Products
| Skill Level | Product | Type | Best For |
|---|---|---|---|
| Beginner | Meguiar's Scratch Eraser Kit | Kit | Light scratches, quick fixes |
| Intermediate | Picture Perfect Polish | One-Step Polish | Versatile, pad-dependent correction |
| Advanced | Sonax CutMax | Heavy Compound | Deep scratches, heavy defects |
| Advanced | Sonax Perfect Finish | Finishing Polish | Final gloss, refinement |
The Fingernail Test: What Kind of Scratch Is It?
Before you start, you need to know what you are dealing with. The fingernail test is the simplest way to assess a scratch.
How to Perform the Test
- Run your fingernail across the scratch.
- If you cannot feel it: It is likely only in the clear coat and can be buffed out.
- If you can feel it but it is light: It may need a more aggressive compound or light sanding.
- If you can feel it clearly: The scratch is likely deep and will require professional help.
The rule of thumb is: if your fingernail catches in it, it probably requires a professional repair.
The Step-by-Step Process
Now that you have the tools and knowledge, it is time to get to work.
Step 1: Wash and Decontaminate
You cannot polish a dirty car. Start by thoroughly washing the car with a good car soap and a grit guard to minimize the risk of introducing new scratches.
After washing, you need to decontaminate the paint. A clay bar will remove bonded contaminants like industrial fallout, tree sap, and tar. These contaminants will cause damage if you try to polish over them.
Step 2: Inspect and Tape
Use a bright light to inspect the paint. A handheld LED or a specialized detailing light will reveal defects that are invisible in normal lighting.
Tape off any trim, badges, or edges that you do not want to polish. This protects them from product buildup and potential damage.
Step 3: The Test Spot
Before you work on the entire car, find a small test spot. This is the most important step in the process.
Apply a small amount of compound to the pad, spread it at a low speed, then work it at a medium speed with overlapping passes. Start with the least aggressive combination and work your way up until you achieve the desired result.
Step 4: Compounding
Once you have dialed in your technique, apply a few pea-sized drops of compound to the pad. Spread it over a 2x2 foot section at a low speed, then increase the speed to work the product.
Make overlapping passes—typically 4 to 6 slow passes—before wiping off the residue with a clean microfiber towel.
Step 5: Polishing
Switch to a polishing pad and a less aggressive polish. The goal of polishing is to refine the finish, removing any micro-scratches left by the compound and bringing out the deep gloss.
The process is the same: apply product, spread it, work it, and wipe it off.
Step 6: Inspect and Repeat
Inspect your work in different lighting conditions. If the defects are still visible, repeat the process. It can take multiple passes to achieve a perfect finish.
Step 7: Protect the Finish
Once you are satisfied with the correction, it is time to protect your work. Apply a quality wax, sealant, or ceramic coating. This will lock in the gloss and provide a sacrificial layer against future damage.
Common Mistakes and How to Avoid Them
Even experienced detailers make mistakes. Here are some of the most common pitfalls and how to avoid them.
❌ Using Too Much Pressure
This can cause holograms, create deeper scratches, and burn through the clear coat. Let the tool do the work. The weight of the machine is usually enough.
❌ Working in Direct Sunlight
This heats the paint and causes products to dry too quickly, making them difficult to remove. Always work in a shaded, cool area.
❌ Skipping Surface Prep
Polishing over dirt and contaminants will cause more damage than you started with. Always wash and clay the car first.
❌ Using the Wrong Pad
Using a cutting pad with a finishing polish will not give you the results you want. Match the pad to the product and the job.
Final Thoughts
Paint correction is a rewarding skill that can transform the look of your car and protect its value. It requires patience, practice, and a willingness to learn from your mistakes.
Start small. Test your technique on a spare panel or a friend's car before working on your own. Watch tutorials from trusted detailers like Ammo NYC, Pan the Organizer, and Dallas Paint Correction.
Remember the golden rule: work safe, test first, and always use the least aggressive method to achieve the desired result.
With the right approach, you can achieve professional-grade results in your own garage.
You might also like:
- Why New Drivers Are More Scared of Car Maintenance Than Anything Else
- Beat the Heat: Your Ultimate Summer Car A/C Guide for 2026
- The 10 Most Controversial Cars Ever Made — And Why They're Still Loved
Disclaimer: Always test any product or technique on a small, inconspicuous area first. The author assumes no responsibility for any damage caused. When in doubt, consult a professional.
Drift Team
Professional detailers and paint correction specialists